This page lists different customization techniques for 1998 Furbys. There are also instructions on how to take apart a Furby.
Skinning[]
Skinning may be done to test for mechanical problems, to wash the fur, or replace the fur entirely. It involves peeling the skin upwards from the bottom and detaching the skin from the faceplate.
You will need:
- Scissors
- Screwdriver (possibly)
Flip your Furby over and look at the bottom, right under the tail there should be vertical stitching, cut the threads of that stitch and pull it apart, there should be a zip tie inside. The zip tie can be kind of tricky to get to in some Furbys, but with patience, you should be able to get it out enough to cut. You may use wire cutters or pliers for this. Pull the zip tie out.
Next, cut the thread connecting the ears to the earbones, they are near the middle top of the ear. There are generally two threads for each ear. Then gently pull the ears off.
Next, start pushing the Furby skin up from the bottom, turning it inside out. (This step will be much harder if your Furby has a tail, or a short “torso” - or a horrible combination of the two). The skin will be connected to the faceplate, which is why we curl the bottom of the skin up to the top so the skin is only attached to the faceplate by the end of it.
There may be skin parts attached with glue, or clasps/hooks coming up to the ears. For the glue, just pull. For the clasps, gently work the skin out of them. You need to carefully get the earbones out of the skin as they can snap. There may also be glue on top of the head, just pull.
Your Furby fur should now be off the entire Furby except the faceplate. There are a couple of possibilities. Your Furby may have glue, screws, clasps, or a combination of both in order to keep the fur down to the faceplate. If it's glue, pull! If it's screwed in, use a screwdriver to take the screws out. If it's clasps, there will be a little square on either side near the beak. Just stick a screwdriver up underneath the clasps and they should pop right off. Your Furby is now free.
")
")
")
")
")
")
")
")
Shucking[]
Shucking refers to removing the shell that protects the Furby's insides. There is generally three screws on the left, three screws on the right, and one screw on the top of the head. Remove these and the two sides of the shell will slide out. You will need to pull it through the ear pieces, and pull out the microphone that is attached to the right side shell. There is also a back sensor that will fall come out - this will need to be put in first because screwing the shell back together.
Removing the second faceplate, eyes and mouth[]
Skin and shuck the Furby. There will be a black "second faceplate" area under the original faceplate you already removed. Take out the screws behind each ear, and pull away the back ear plate and the three ear pieces. Remove the screw hidden behind these that is attached to the part directly below the light sensor. Pull the light sensor out of the slot. Next, remove the two screws holding the tummy sensor plate down. Pull away the tummy plate and remove the large screw that is holding the black second faceplate down.
There is a metal rod that goes through both the eyes and the mouth. The two ends of each rod stick out on either side. Push this rod out with something sharp like a pencil. The second faceplate is now free. Taking it off will make the eyes and mouth fall out. You should keep note of how the eyes and mouth are in place so it is easier to put back together.
Beak Carving[]

Image by furbeeb.
An example of beak carving is the owo beak, where the middle of the top beak is cut off.
You will need:
- Pencil/Sharpie
- Knife or carving tool
- Sandpaper or nail file
Draw where you would like the cut the Furby beak with a pencil or sharpie. You may use a hairdryer to soften the beak slightly beforehand, just to make cutting easier, as the beak is quite thick. Using a knife or carving tool, cut into the beak around before the line. You may need to be outside and wear a mask for the next step because of the small plastic particles being released into the air. Sandpaper or file it down to the line to smooth it out.
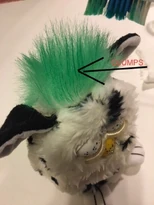
Hair Dyeing[]
Furbys have synthetic fur, which means they are a type of plastic. Because of this, most commercial dyes do not work on Furbys. You will need to use acrylic paint.
You may use this method to dye any of the hair on a Furby, including hair tuft, fur and eyelashes.
It is best to skin your Furby before painting but if just doing the hair tuft it's safe not to skin.
You will need:
- Glass of water
- Small bowl
- Acrylic paint
- Paintbrush
- Toothbrush
- Newspaper/paper towels

Image by rainbow-valley-furbys.
First, lay down newspaper or paper towels in case of spillages!
Next, create a paint wash (thinned-out paint) inside the small bowl. To do this, squirt in a coin-sized blob of acrylic paint, and fill it with slightly more water than paint, and mix with a paintbrush. You want it to be runny, not thick.
If you are planning on dyeing a particular area of the Furby's fur, make sure you comb it evenly/flat and away from parts you don't want to be dyed!
Next, dip your toothbrush into the paint wash. Tap your wash-soaked toothbrush out on a paper towel to remove excess wash. This step is important because you want your toothbrush WET with paint but not SOAKING wet. It’s best to start out first with a tiny dab of wash to play around with and then work your way up to a more saturated toothbrush. Next, comb your wash-filled toothbrush through your Furby’s hair. If there is too much wash on the toothbrush, the hair may clump together. If you do not want the fur to look matted once it's dry, wipe the dye off with a paper towel, and use less wash in future strokes! The lower parts inside the hair that aren't getting dyed will need to be dyed with the paintbrush. Dip your paintbrush in the paint wash and dab the parts that haven't been dyed yet. Continue adding the wash into the hair and combing it through until you like what you see! You may use a hairdryer on the cold setting to dry the dye more quickly (if it's on the hot setting the fur may melt). If not, leave the Furby to dry for an hour. While you dry, you can continue to brush the hair with the toothbrush to get rid of any remaining clumps!
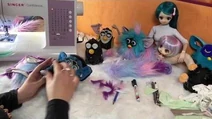
Long tails and shaggy fur[]
Video:
Eyechips[]
Removing eyechips[]
There are three methods.
Method one: Place your Furby in the fridge for around an hour. This will help un-strengthen the glue and slightly shrink the eyechips. Then, try to pull the eyechips out. You may need to try this multiple times.
Method two: Get a glue stick and melt the tip of the glue with a match it to the eyechips. After it dries, pull on the glue stick and the eyechip will come off with it. The hot glue may damage the plastic eyechip.
Method three: Skin and shuck (remove the fur and the shell) of the Furby, and carefully remove the eye pieces - see how to do this above. This may be hard to remember how to put back together, and it can be difficult to get the eye rod back through the eye pieces. Once you have taken out the eyes (the white piece with the eyechips) there will be a tiny hole at the back. Poke a sharp object such as a pencil through the hole, and it should pop out. There is glue holding the chip down so you may need to press hard or place the eyes in a fridge for an hour beforehand.
")
Customizing eyechips[]
The eyes can be customized by making new eyechips by painting the back or printing the art you made for the eyechip, or you can buy premade ones.
Method one: Print on paper a circular eye design you would like to put on the Furby. Cut the design out. Glue a curved, plastic eyechip on top of the paper - you may need to buy these specially or find something similar online. You may also skip this and simply glue the paper design inside.
Method two: Paint a design onto the back of an eyechip and then glue it on, or directly onto the Furby's white spaces where the eyes were, or even directly onto the pre-existing eyechip.

Faceplates[]
Faceplates can be painted, swapped or replaced by specially molded ones.
Faceplates are often molded and used on non-Furby toys to make them look like Furbys- these are known as "oddbody" Furbys.
Sunbleaching, sunfading, yellowing[]
Sunbleaching, also known as sunfading or yellowing, is where plastic has been chemically damaged from being left in the sun, or has slowly absorbed sun over time, turning the plastic different colors. The colors it changes to are dependent on the make-up of the type of plastic but generally stays in the game range. White will turn yellow. It is well-known in vintage or otherwise old toys to experience sunbleaching. Both the fur and the face plastic of a Furby can be affected, however only the faceplate, beak, eyes is considered fixable. Ironically, fixing sunbleaching involves using the sun.
Fixing faceplate sunbleaching[]
You will need:
- Hydrogen peroxide 3%-6%
- A paintbrush or a container
- The sun (or special UV emitter)
- Patience
The hydrogen peroxide uses the UV rays from the sun to chemically reverse the sunbleaching. Hydrogen Peroxide is the active ingredient in Oxi Clean and 40 Volume Creme Developer so these are also suitable.
The amount of time the conversion will take depends on how intense the sun will be. It will take longer if it is cloudy. You may also put the Furby at a window instead of outside. The conversion can take 2 days to 2 weeks.
Furbys with pink, red, or purple parts on them may need to be looked at more closely as these colors have been documented to have issues in other toys, though may not apply to Furbys at all.
Method one: Place your Furby in the sun. You may also want to pop the eyechips out. Apply hydrogen perozide with a paintbush over the affected areas once every one or two hours. Make sure to move your Furby to be facing the sun as the sun moves.
Method two: Completely remove the affected parts from the Furby. Fill a container of hydrogen peroxide so it will be high enough to cover the affected parts. Leave this container in the sun with the parts inside (a lid if recommended).